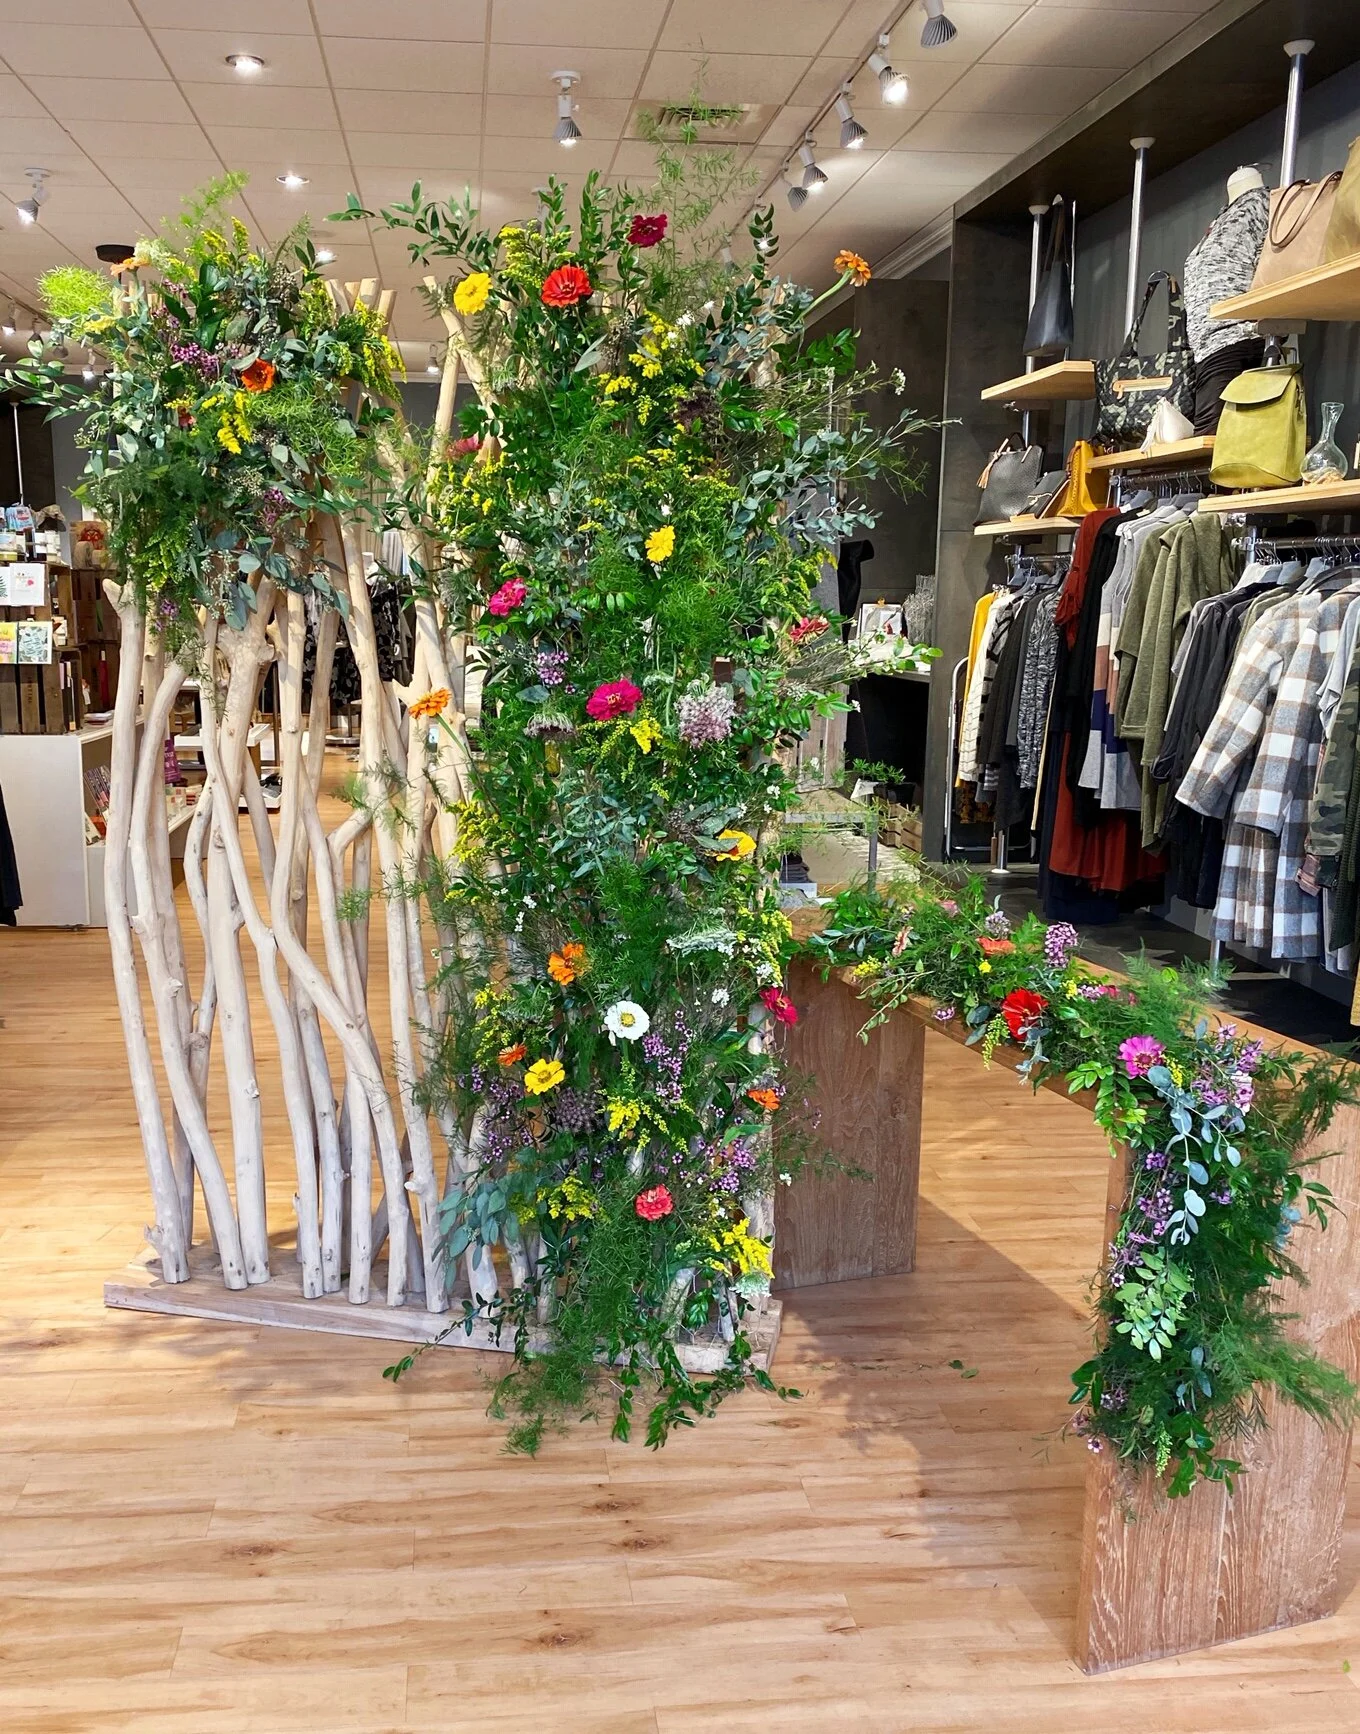
Tips for Building a Fresh Flower Wall
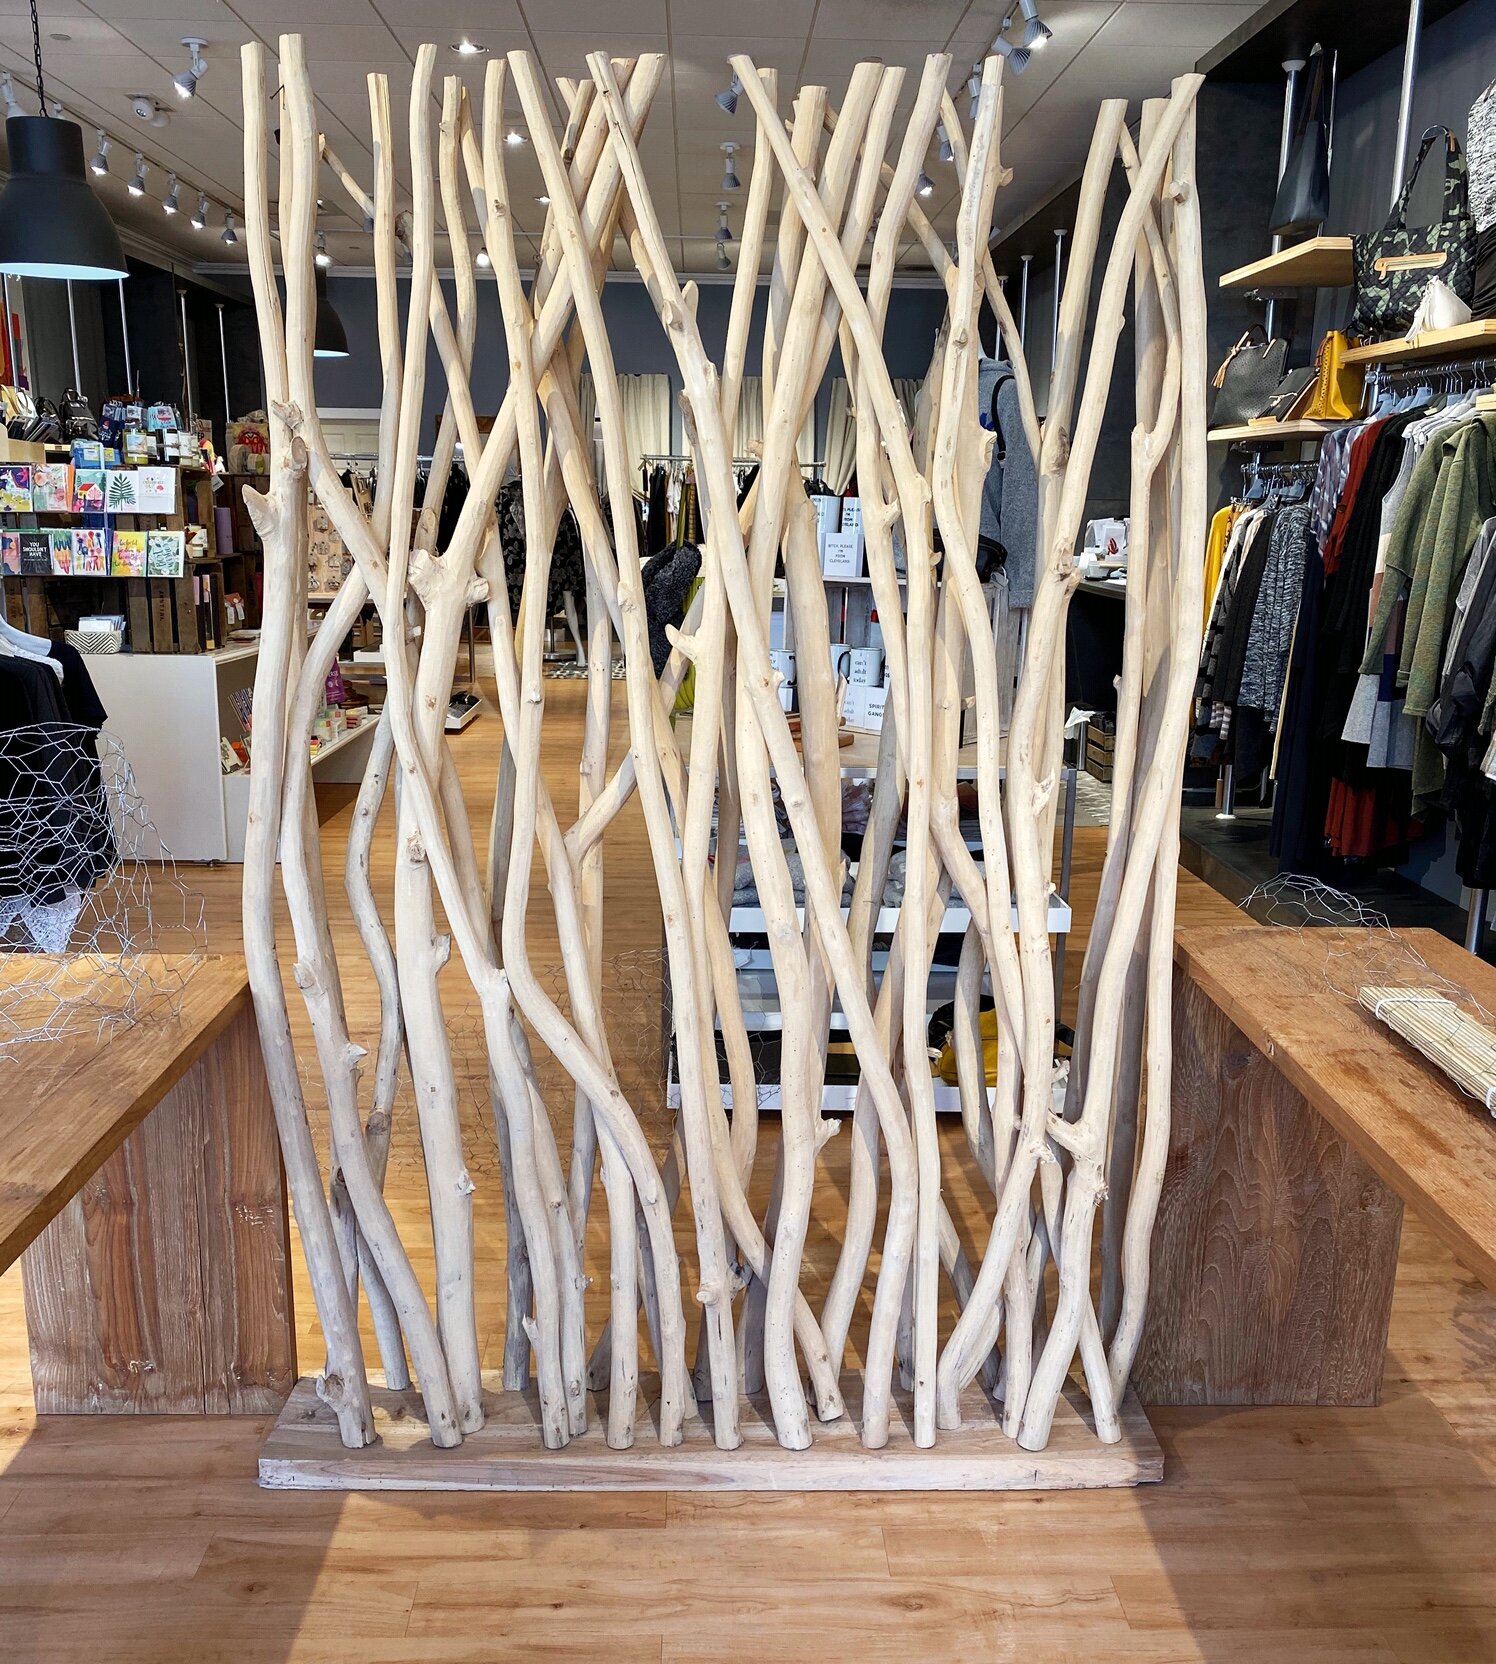
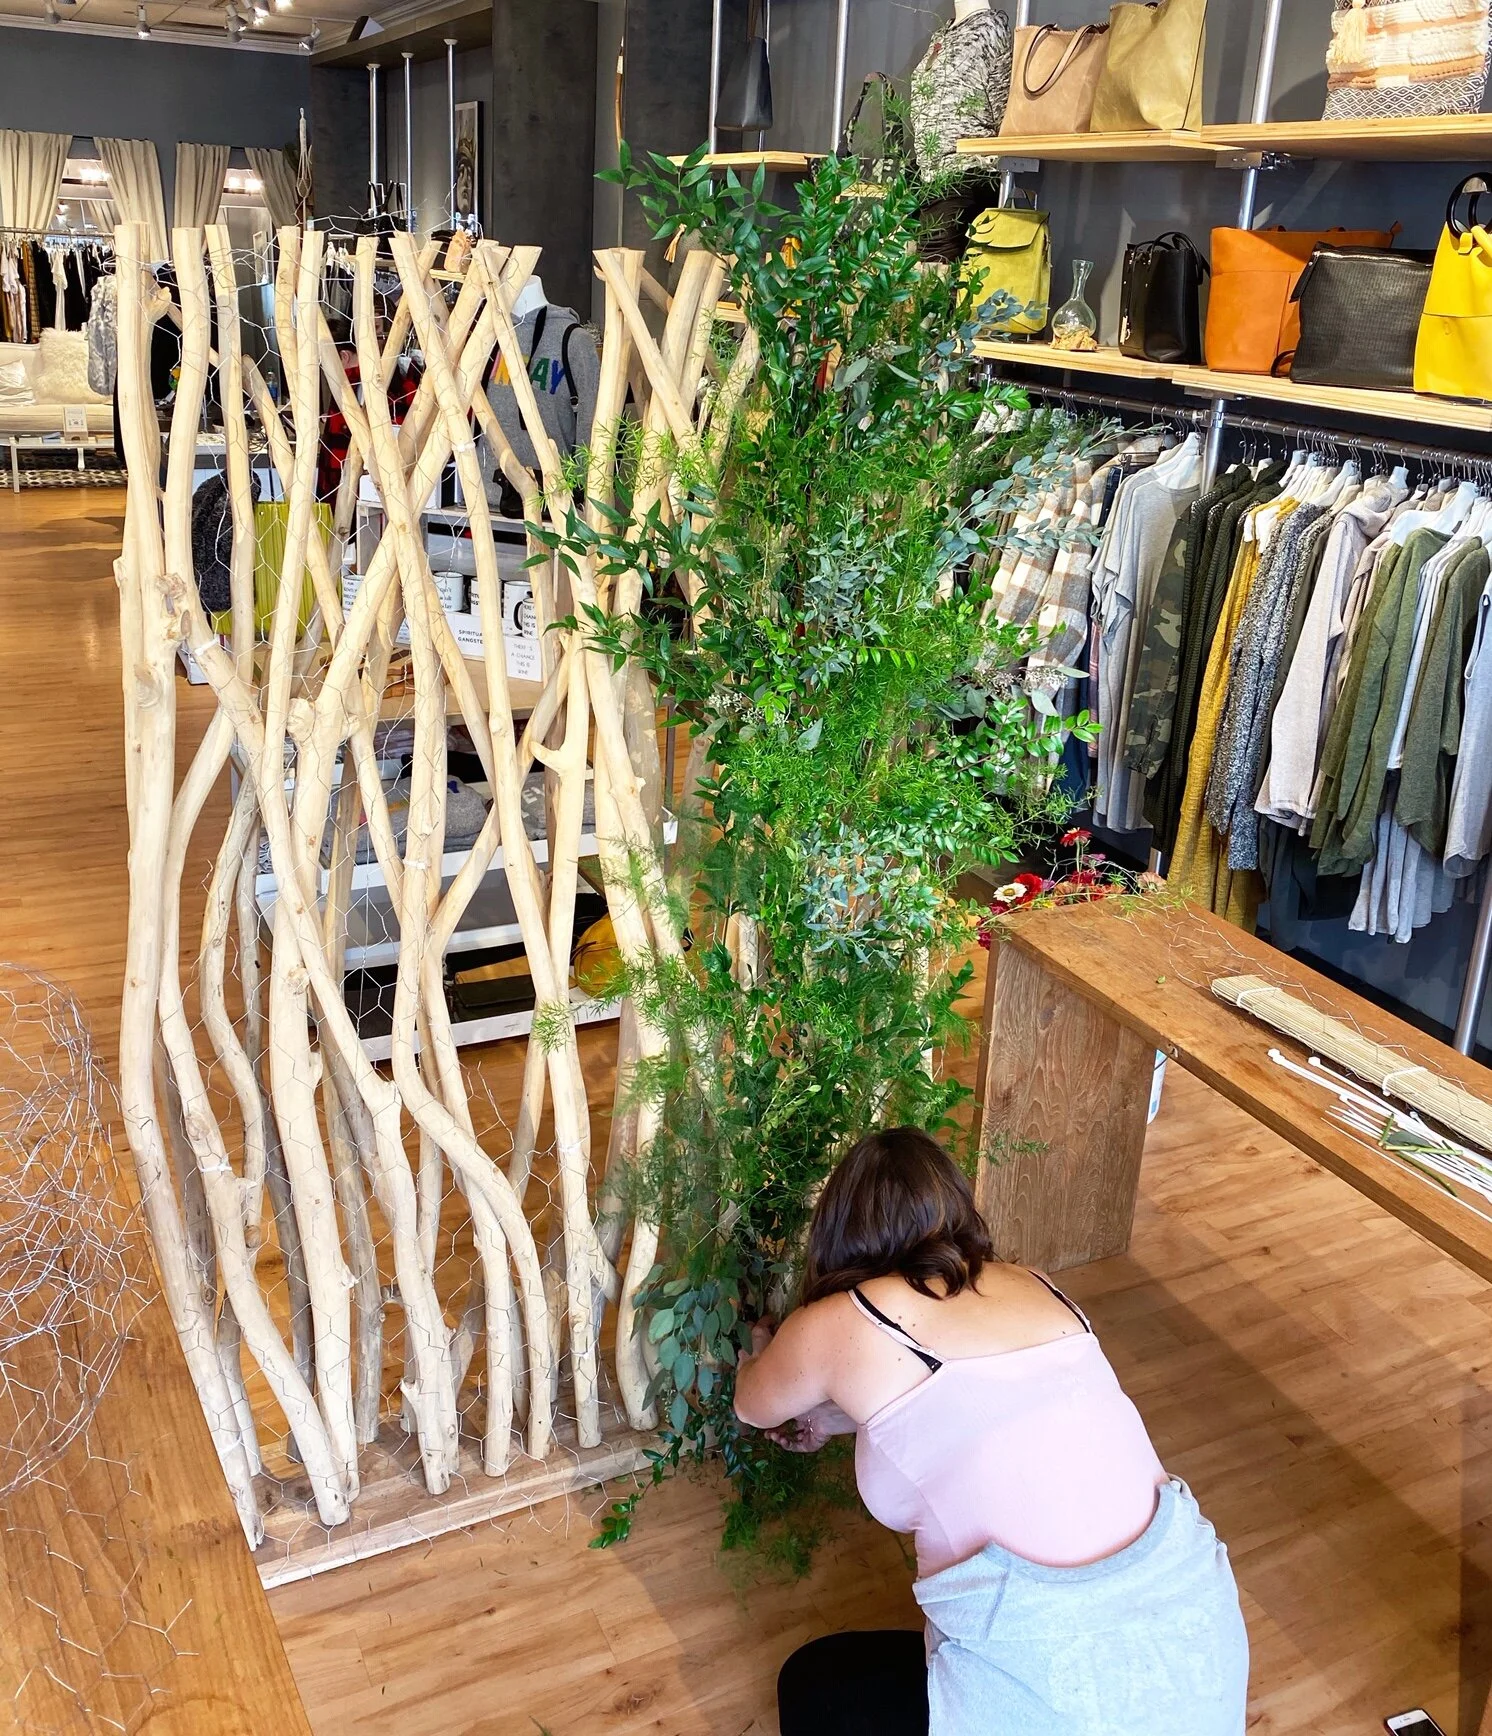
I built this flower wall for a happy hour styling event at local Cleveland boutique, Banyan Tree. I wanted the installation to look like the walls of a wild secret garden and only use fresh flowers and greenery. There were only a few building materials used; the driftwood wall, zip ties and chicken wire. I wanted to keep the process as simple as possible and I decided that I would not be using any water source. I was able to get away without a water source for the florals for a few reasons; the event was only going to be a few hours, it would not be in the direct sun and summer heat, and the materials I would be using would be freshly cut from my garden and i knew they would last awhile out of water because of testing I had done.
I could have used oasis floral foam, but i chose not to because it is not good for our environment and i try to work with the least amount of materials to create less waste. I could have used eco fresh wraps, which I am a HUGE fan of, but i knew this wall would be somewhat see though and i didn’t want to risk guests seeing my mechanics. So I went with what I knew would work. This is a project that any beginner will feel comfortable building and following my tips will definitely help you stay away from rookie mistakes.
Test your fresh floral materials before you use them out of water. Keep them on your kitchen counter over night and see how they appear in the morning. If they aren’t droopy, they’re good to use!
The waxier the greenery, the better it lasts out of water. Ruscus is especially good for this!
Zinnias that are a little past their harvest prime do better out of water. Their stems are much stronger, helping them appear fresh much longer. These are going to be found at a local farm and not from a wholesaler.
Test some dahlias too! They’re beautiful and many can last out of water if they are fresh. Water tube them if necessary, but their stems are very strong and hold their blooms up well.
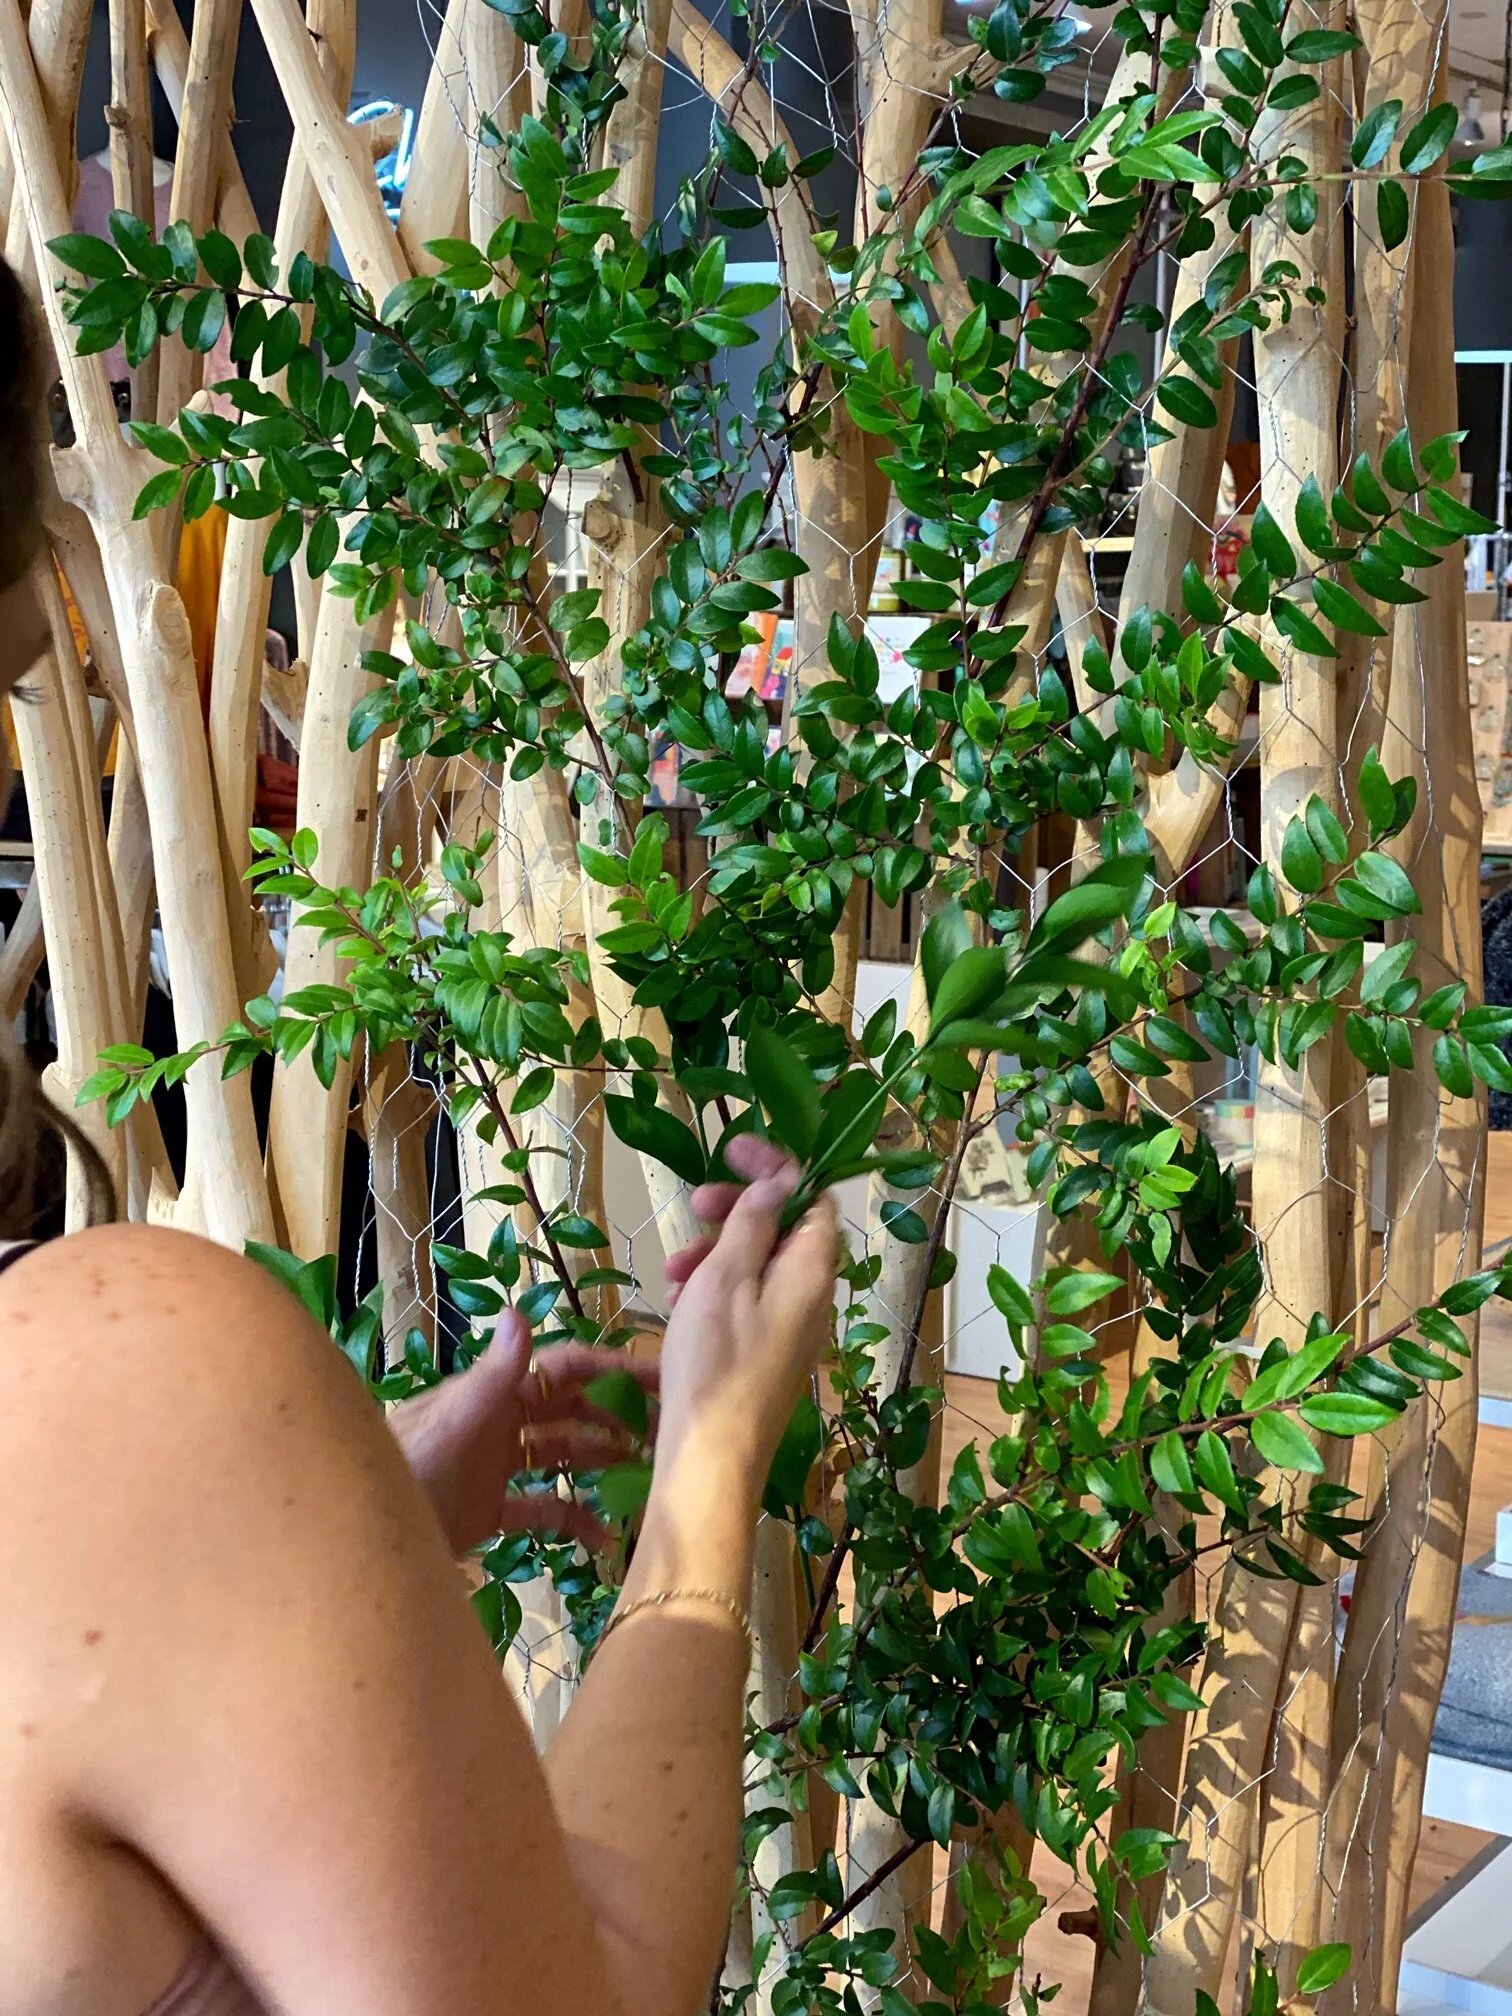
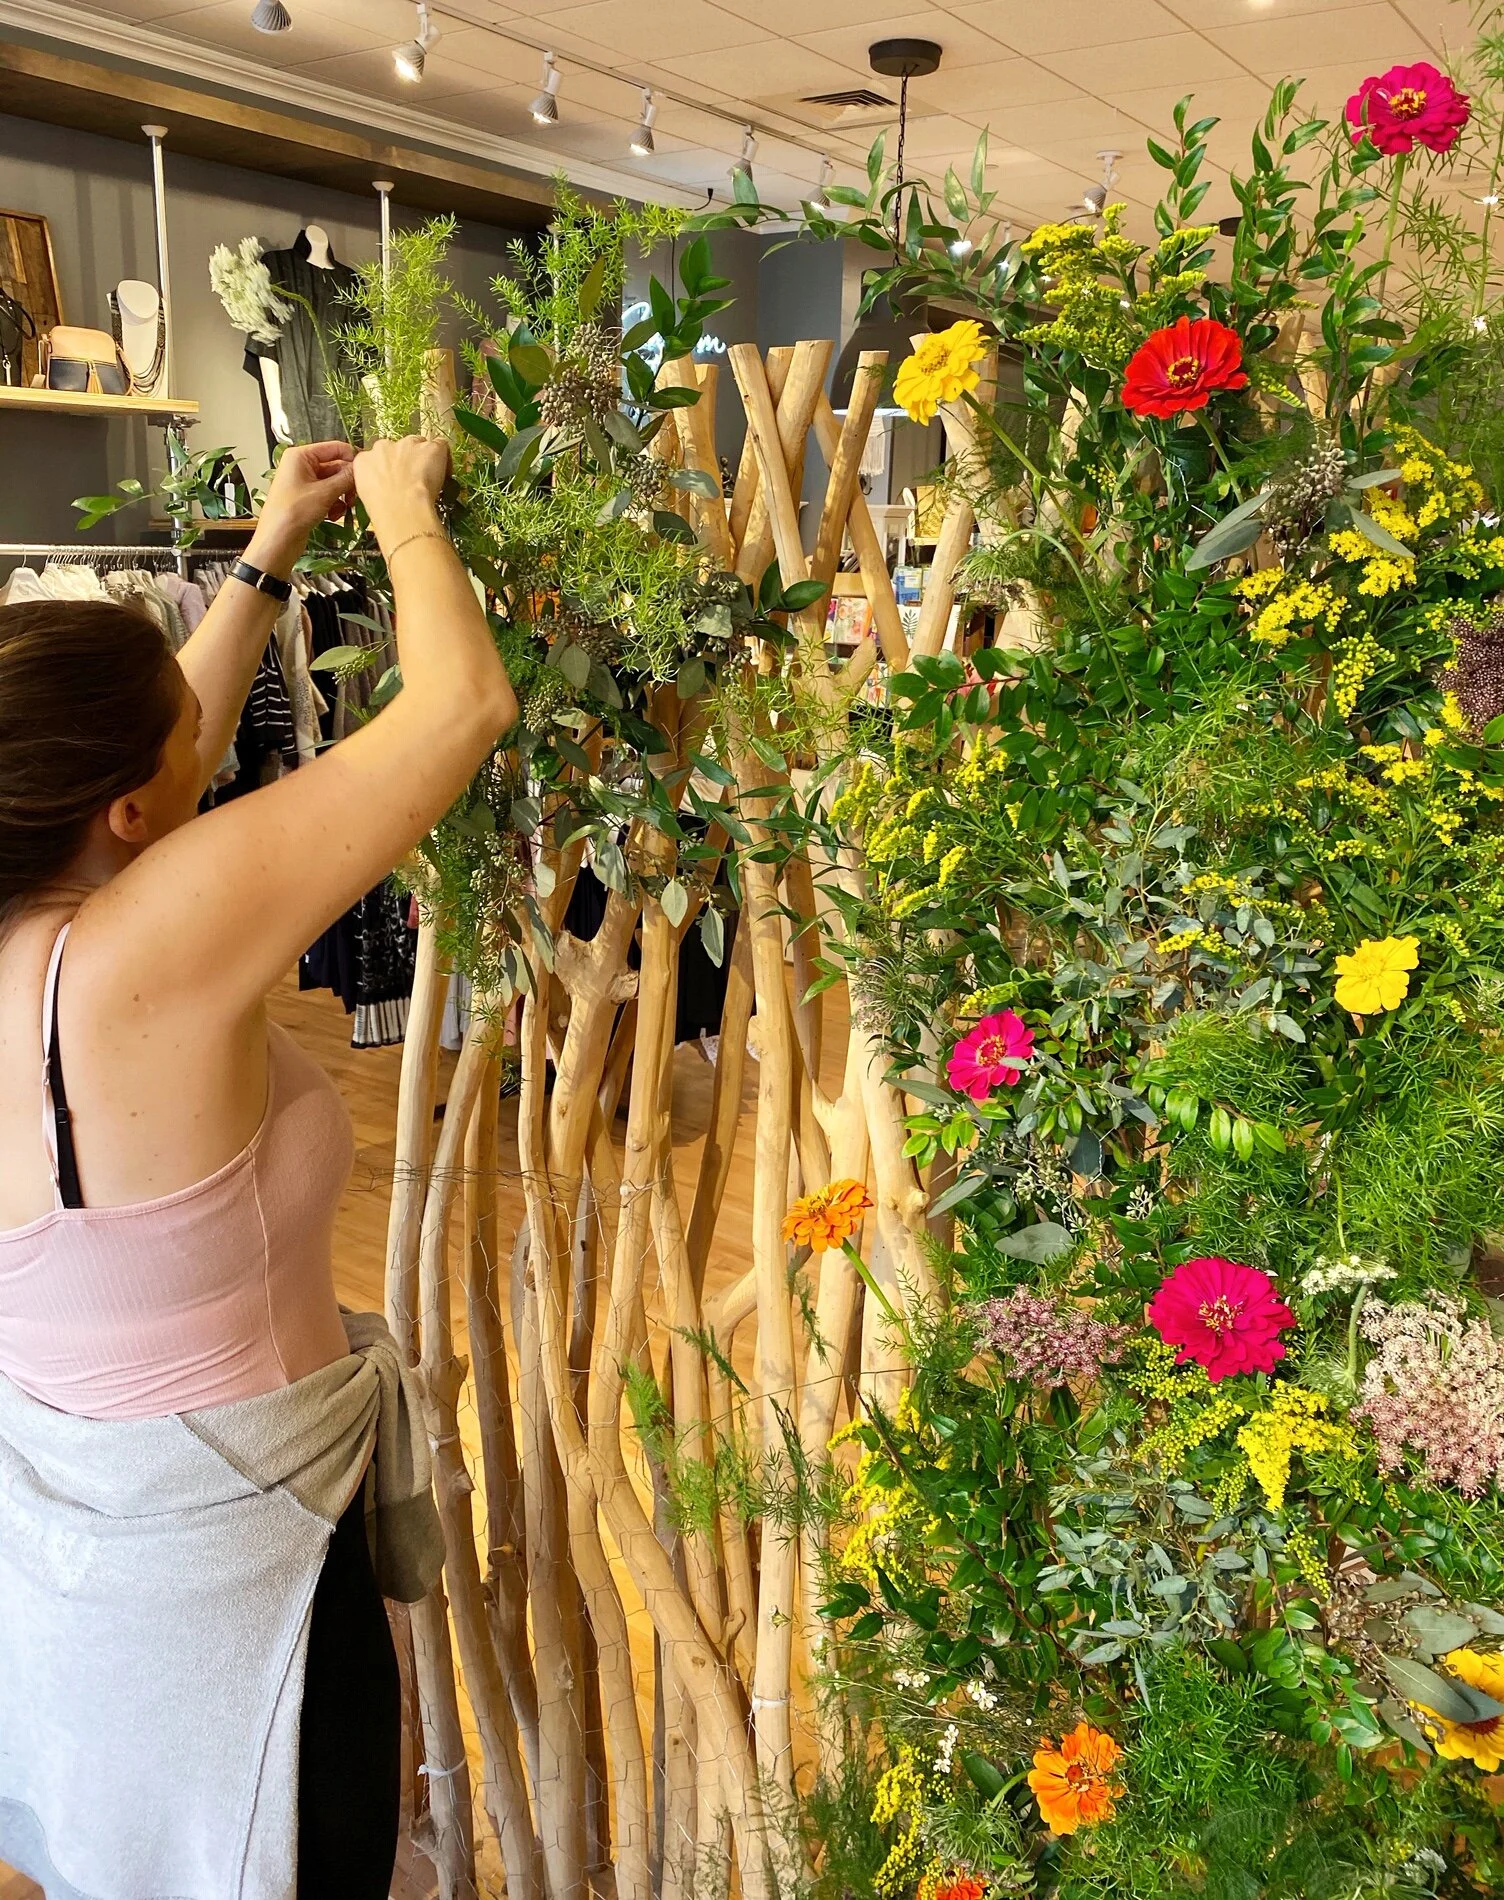
Once you have your flowers and greens picked, you will want to prep them for the wall. Flowers should have all leaves removed and be cut to different lengths. This will give the wall depth. The longer the greens, the wilder the wall.
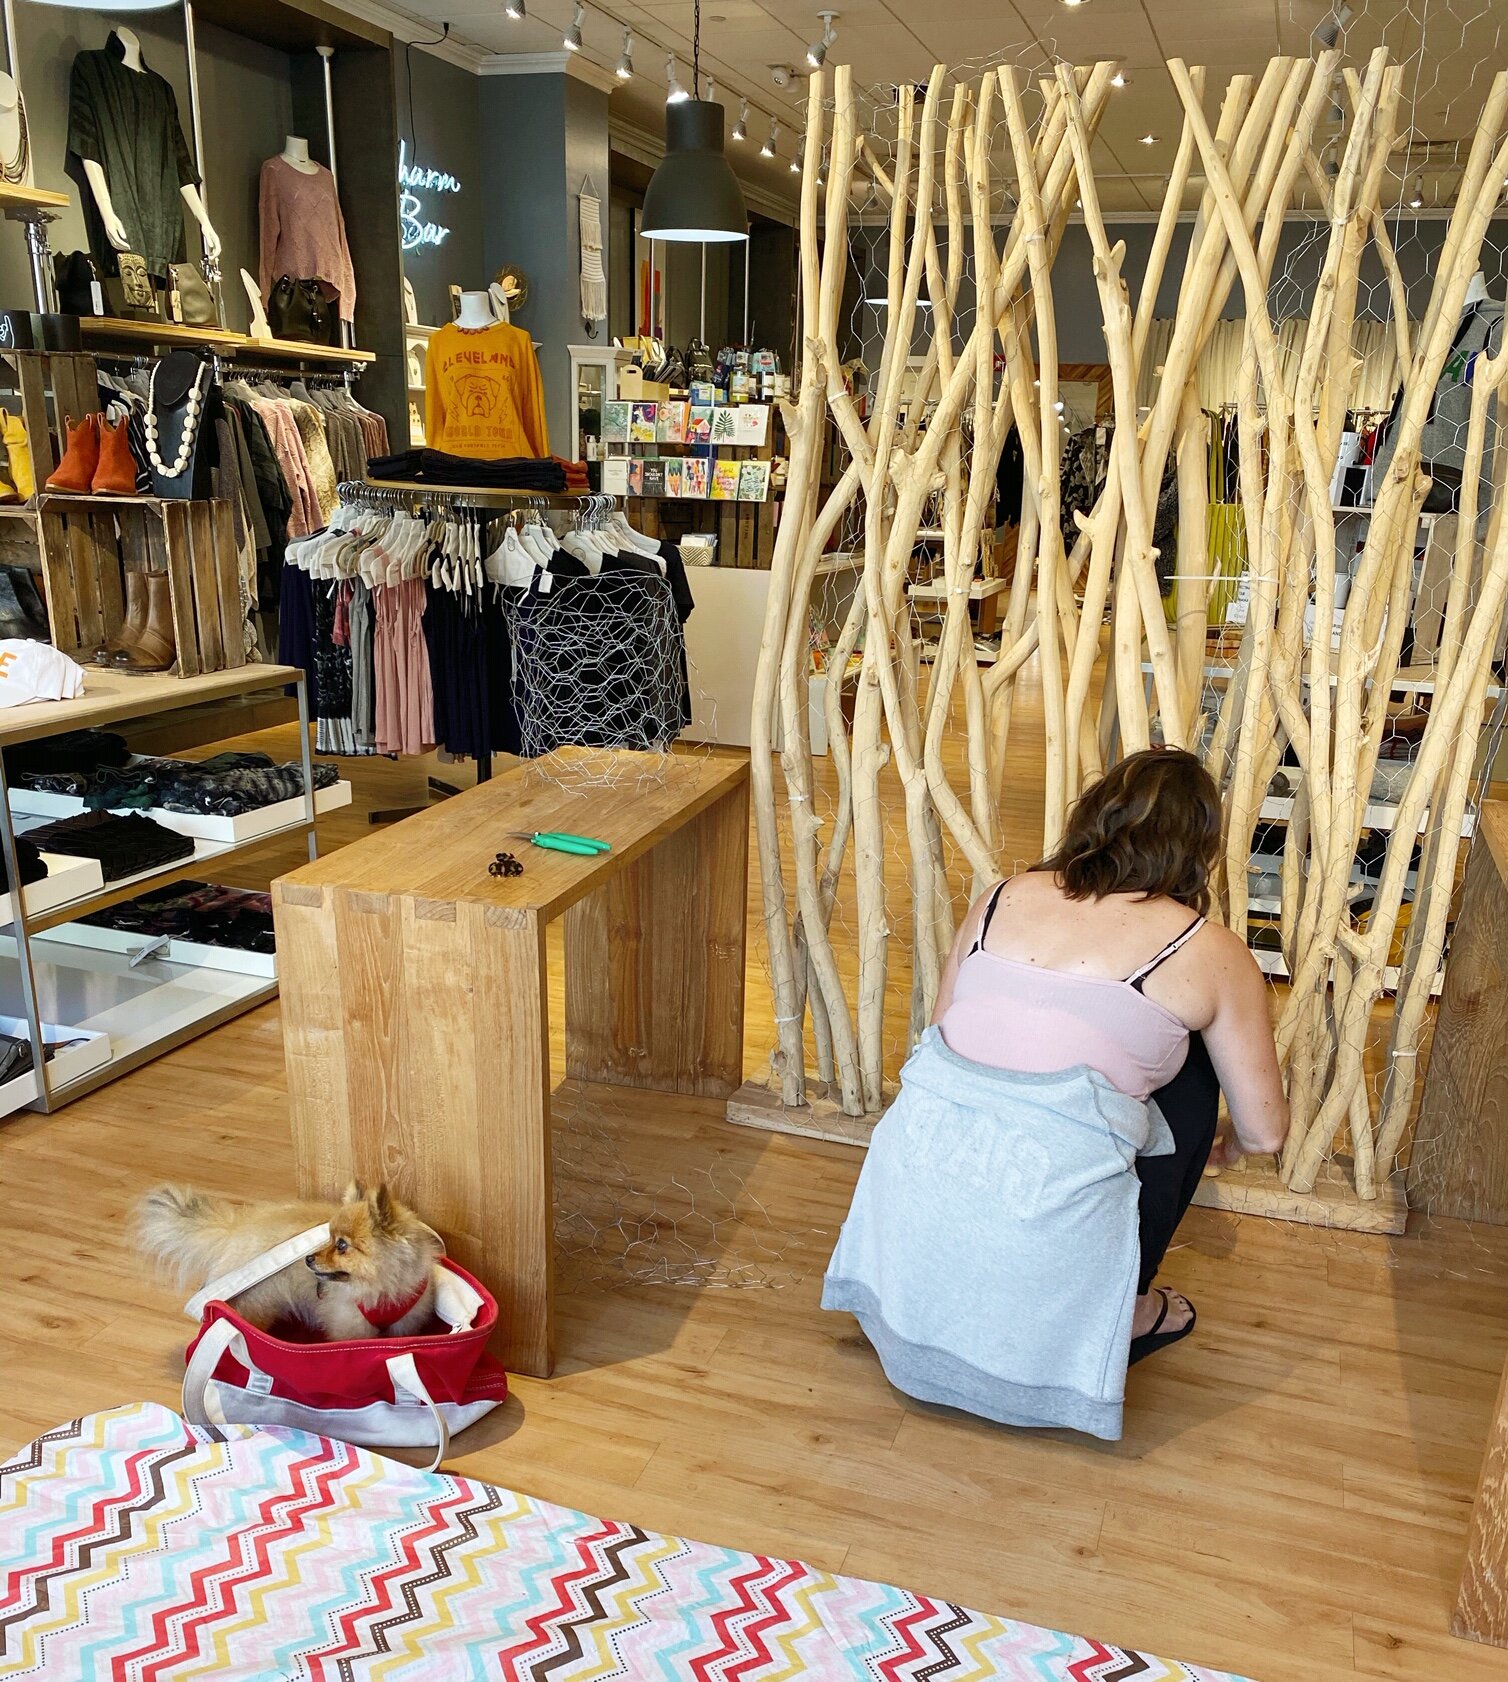
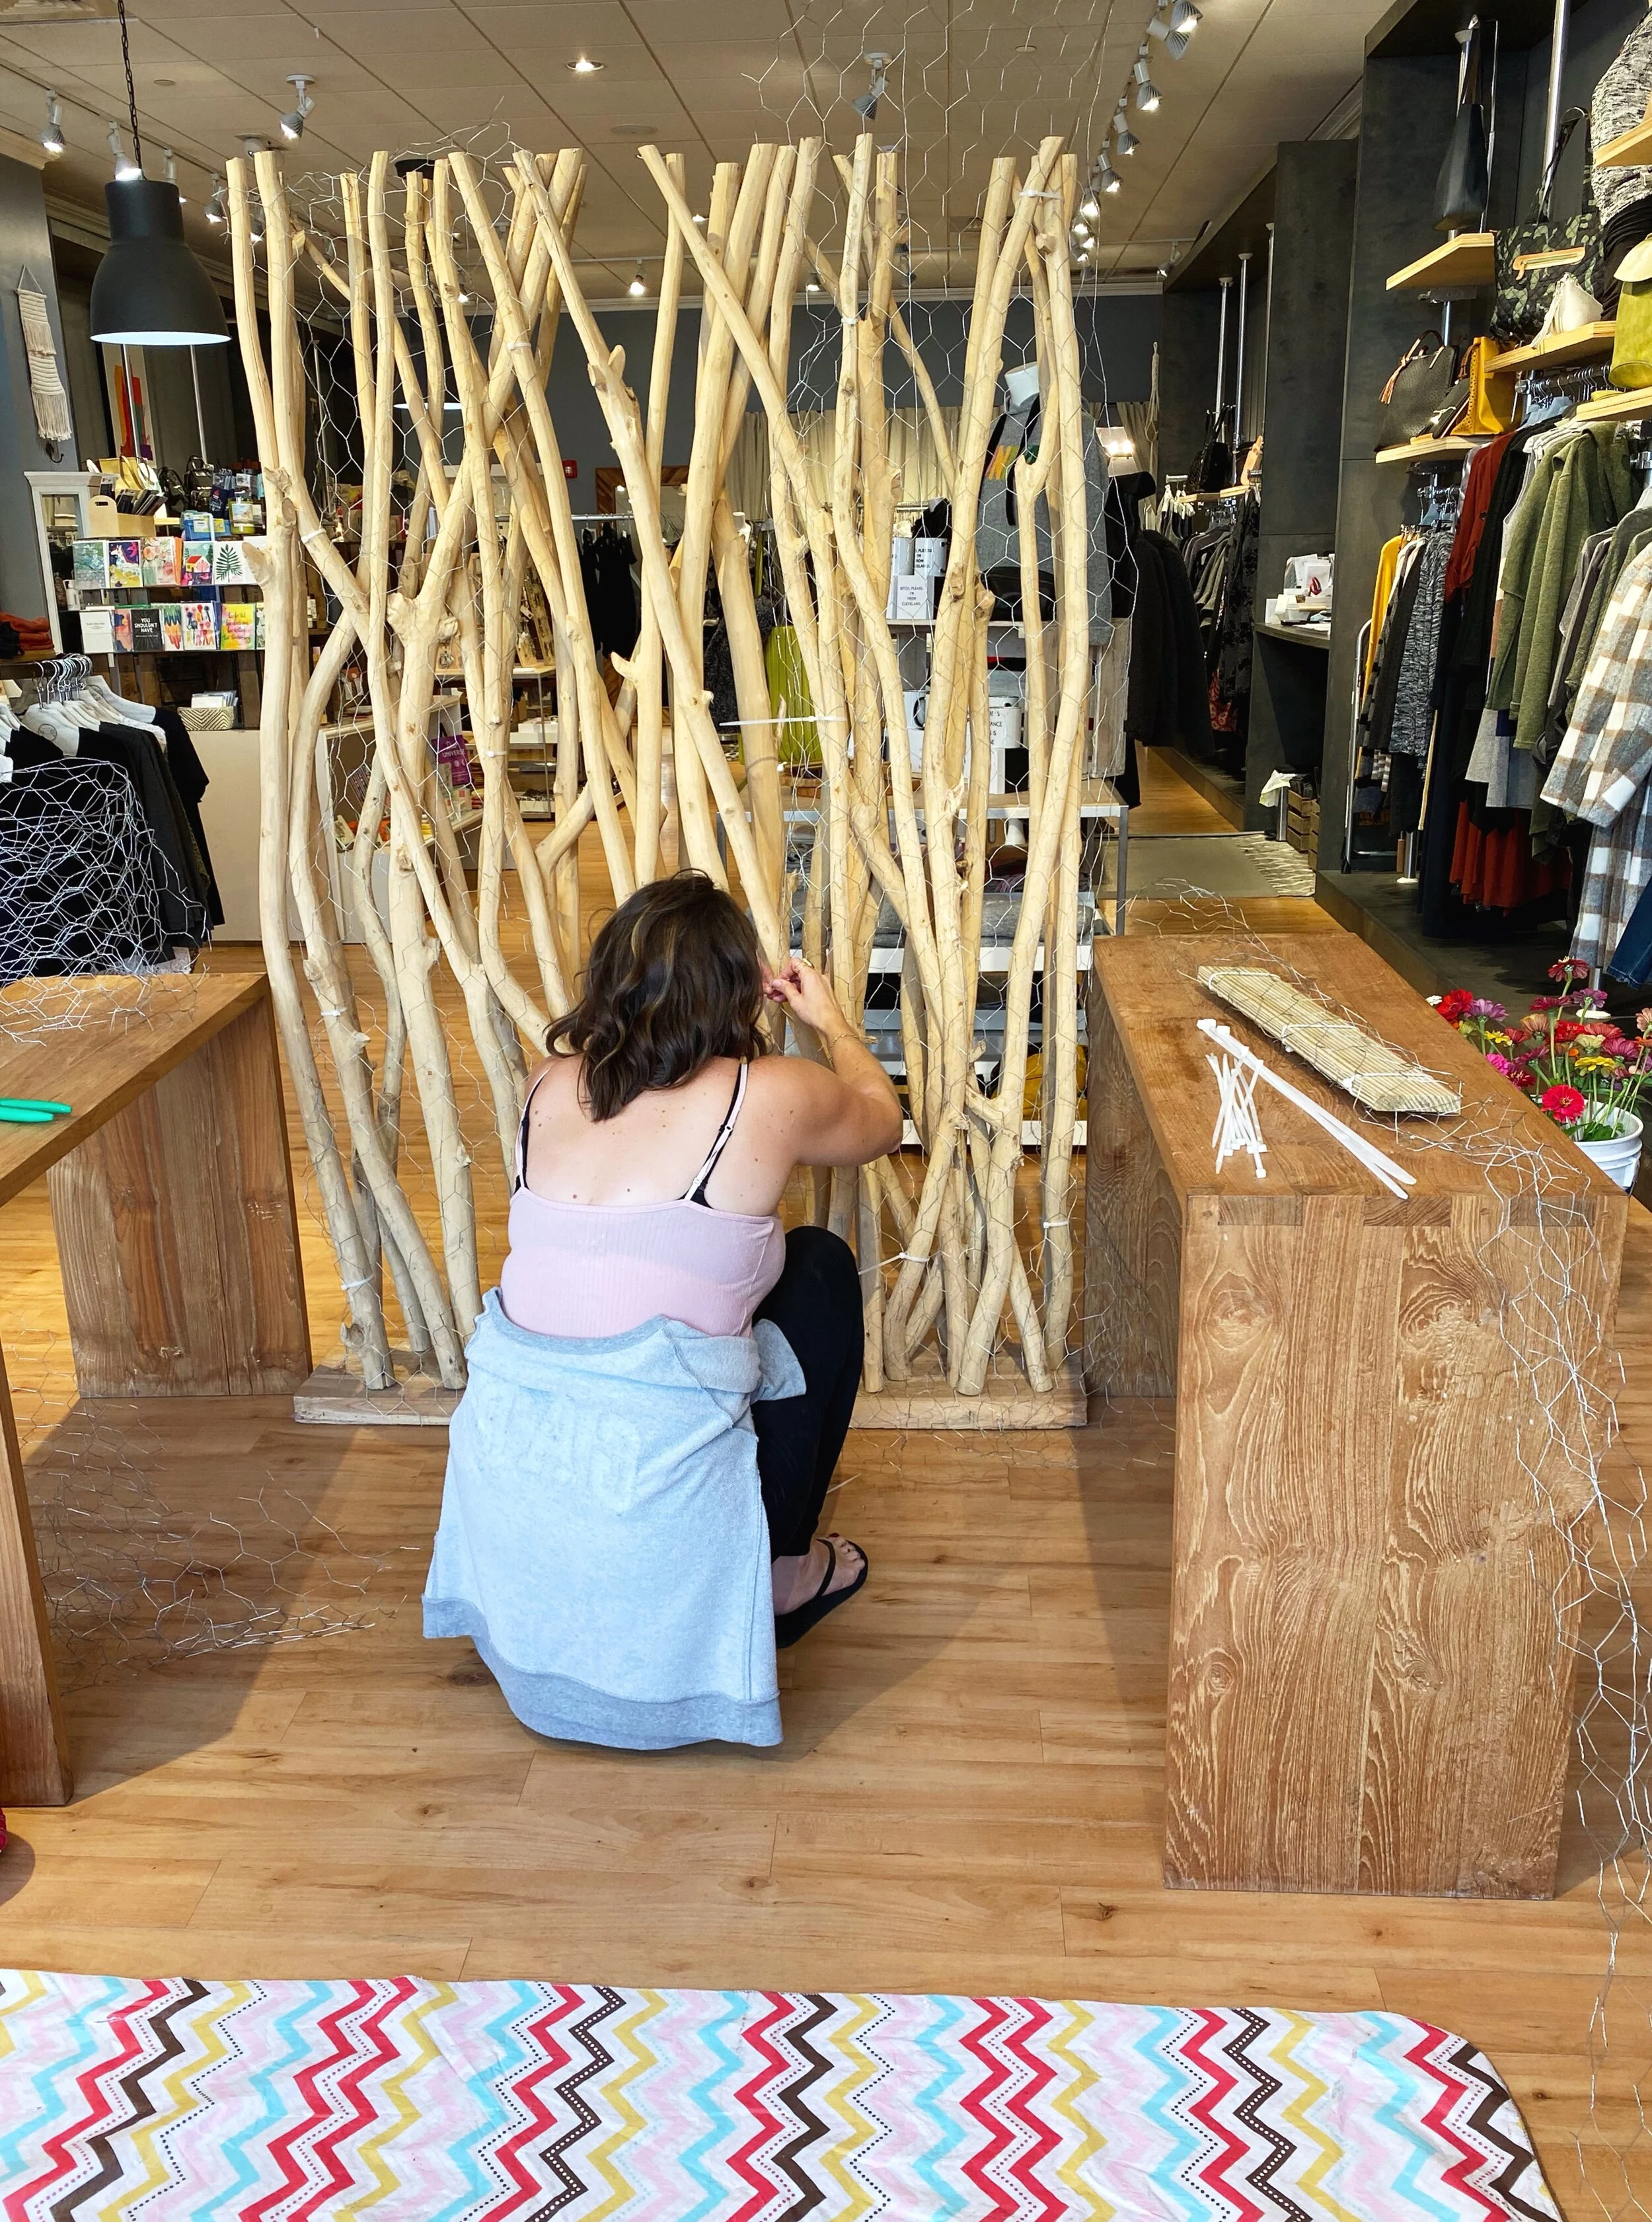
To start the actual installation, cut chicken wire into the shape you want to make the wall. This wall was 6 ft tall and had a base about three feet wide. To the left, I cut the chicken wire into a circle.
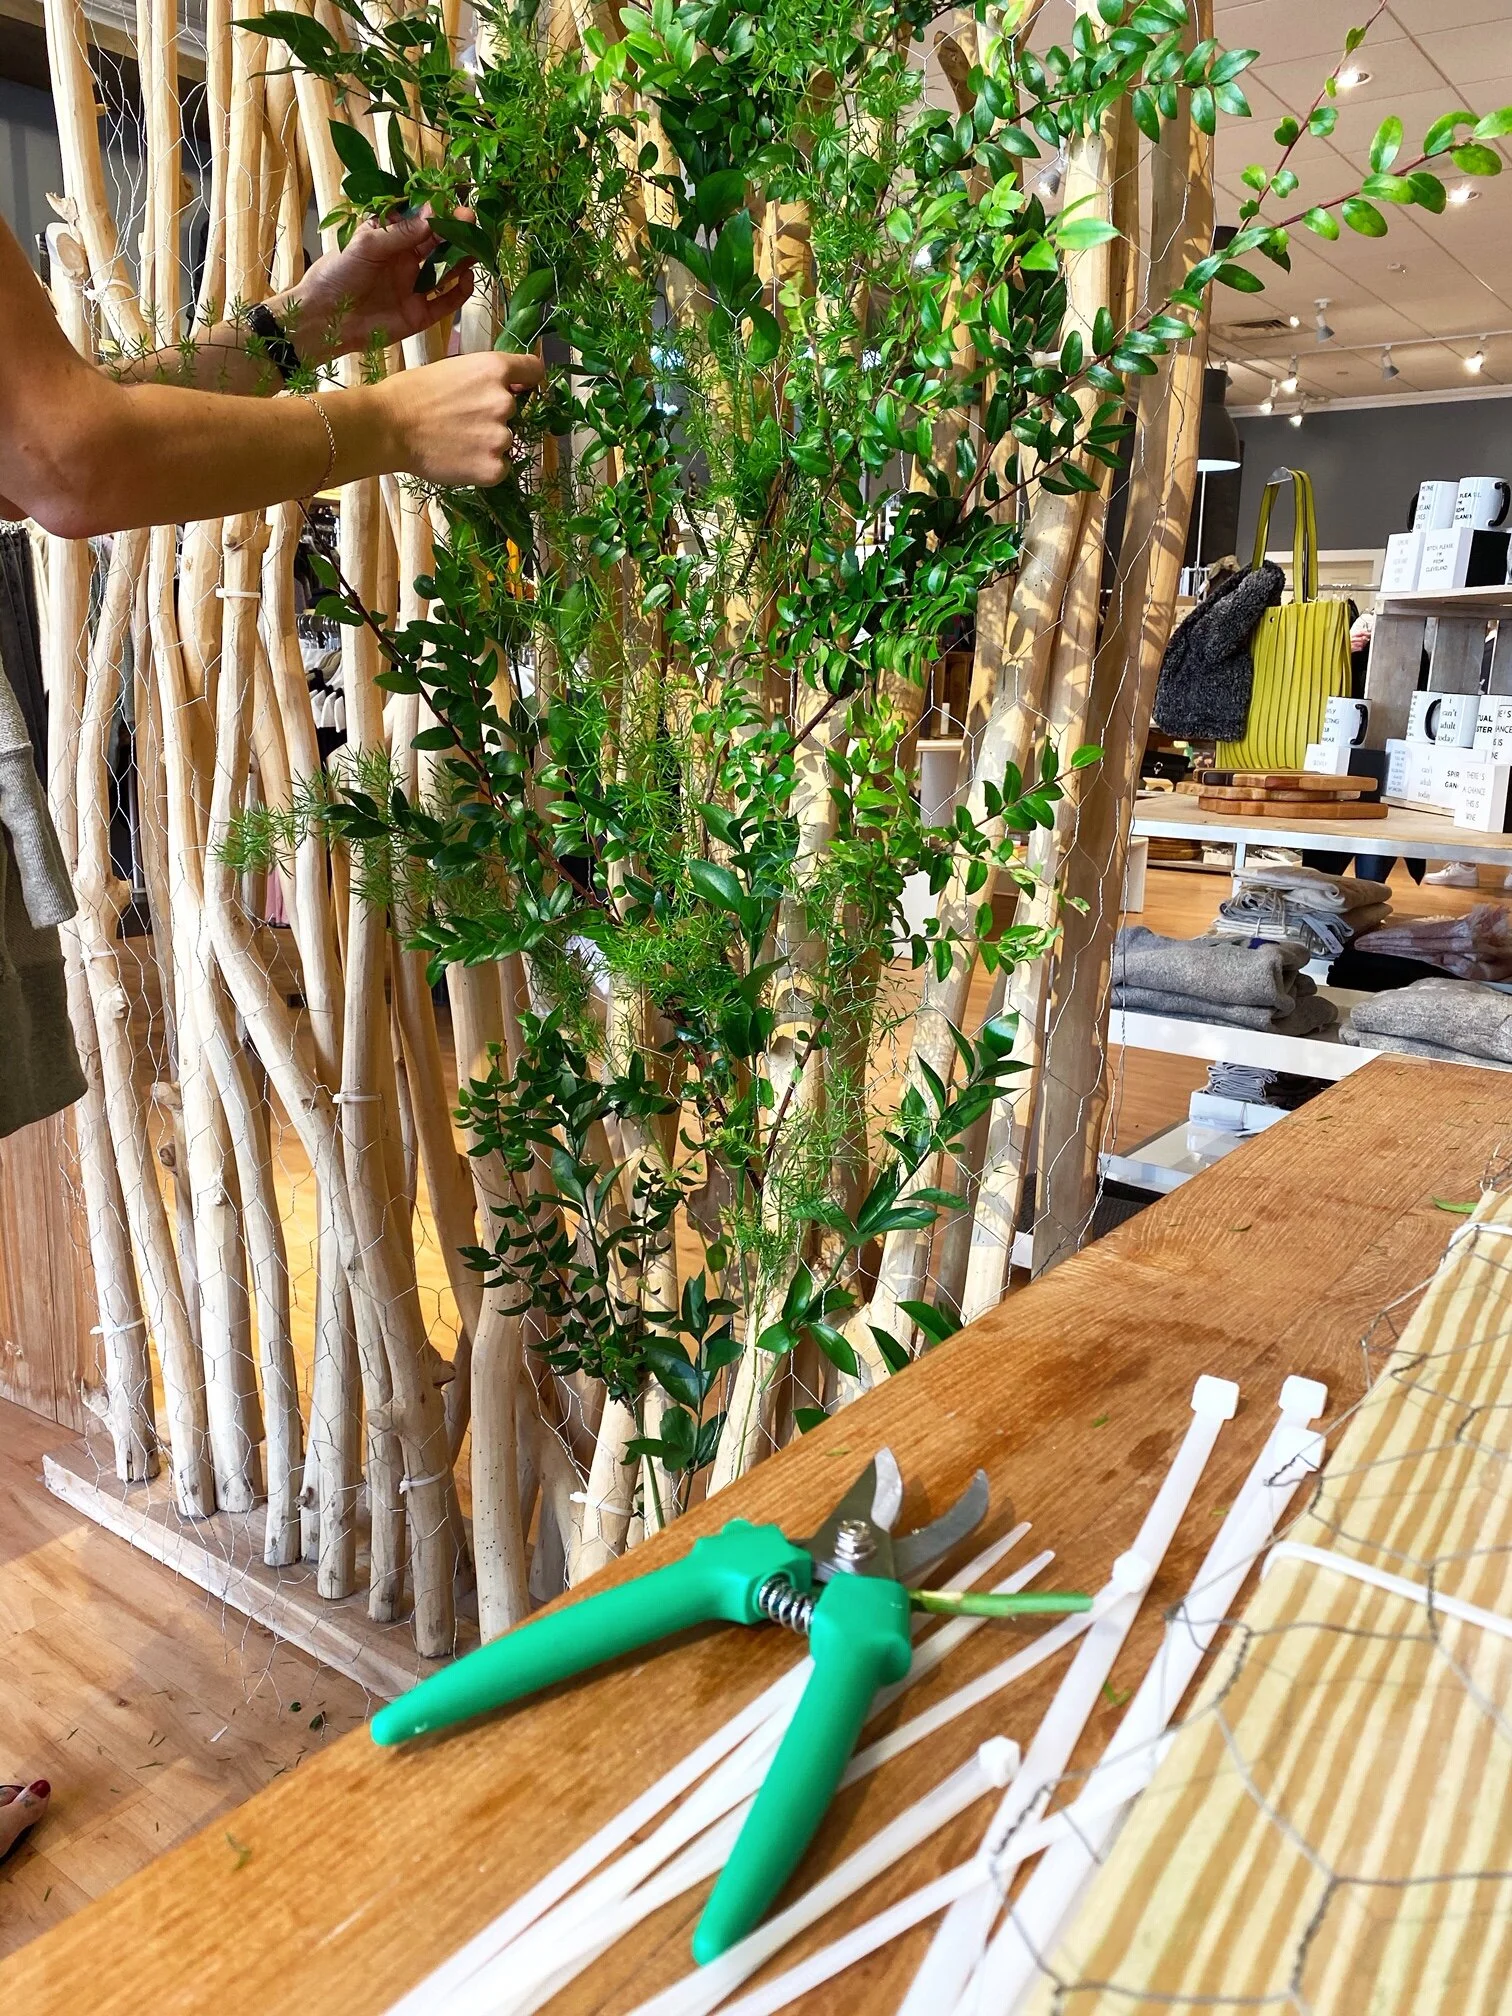
Attach the chicken wire to your structure with heavy duty zip ties. These are easy to use and remove.
Start with the greenery as your base. Weave the stems into the chicken wire and add lighter greens in certain areas.
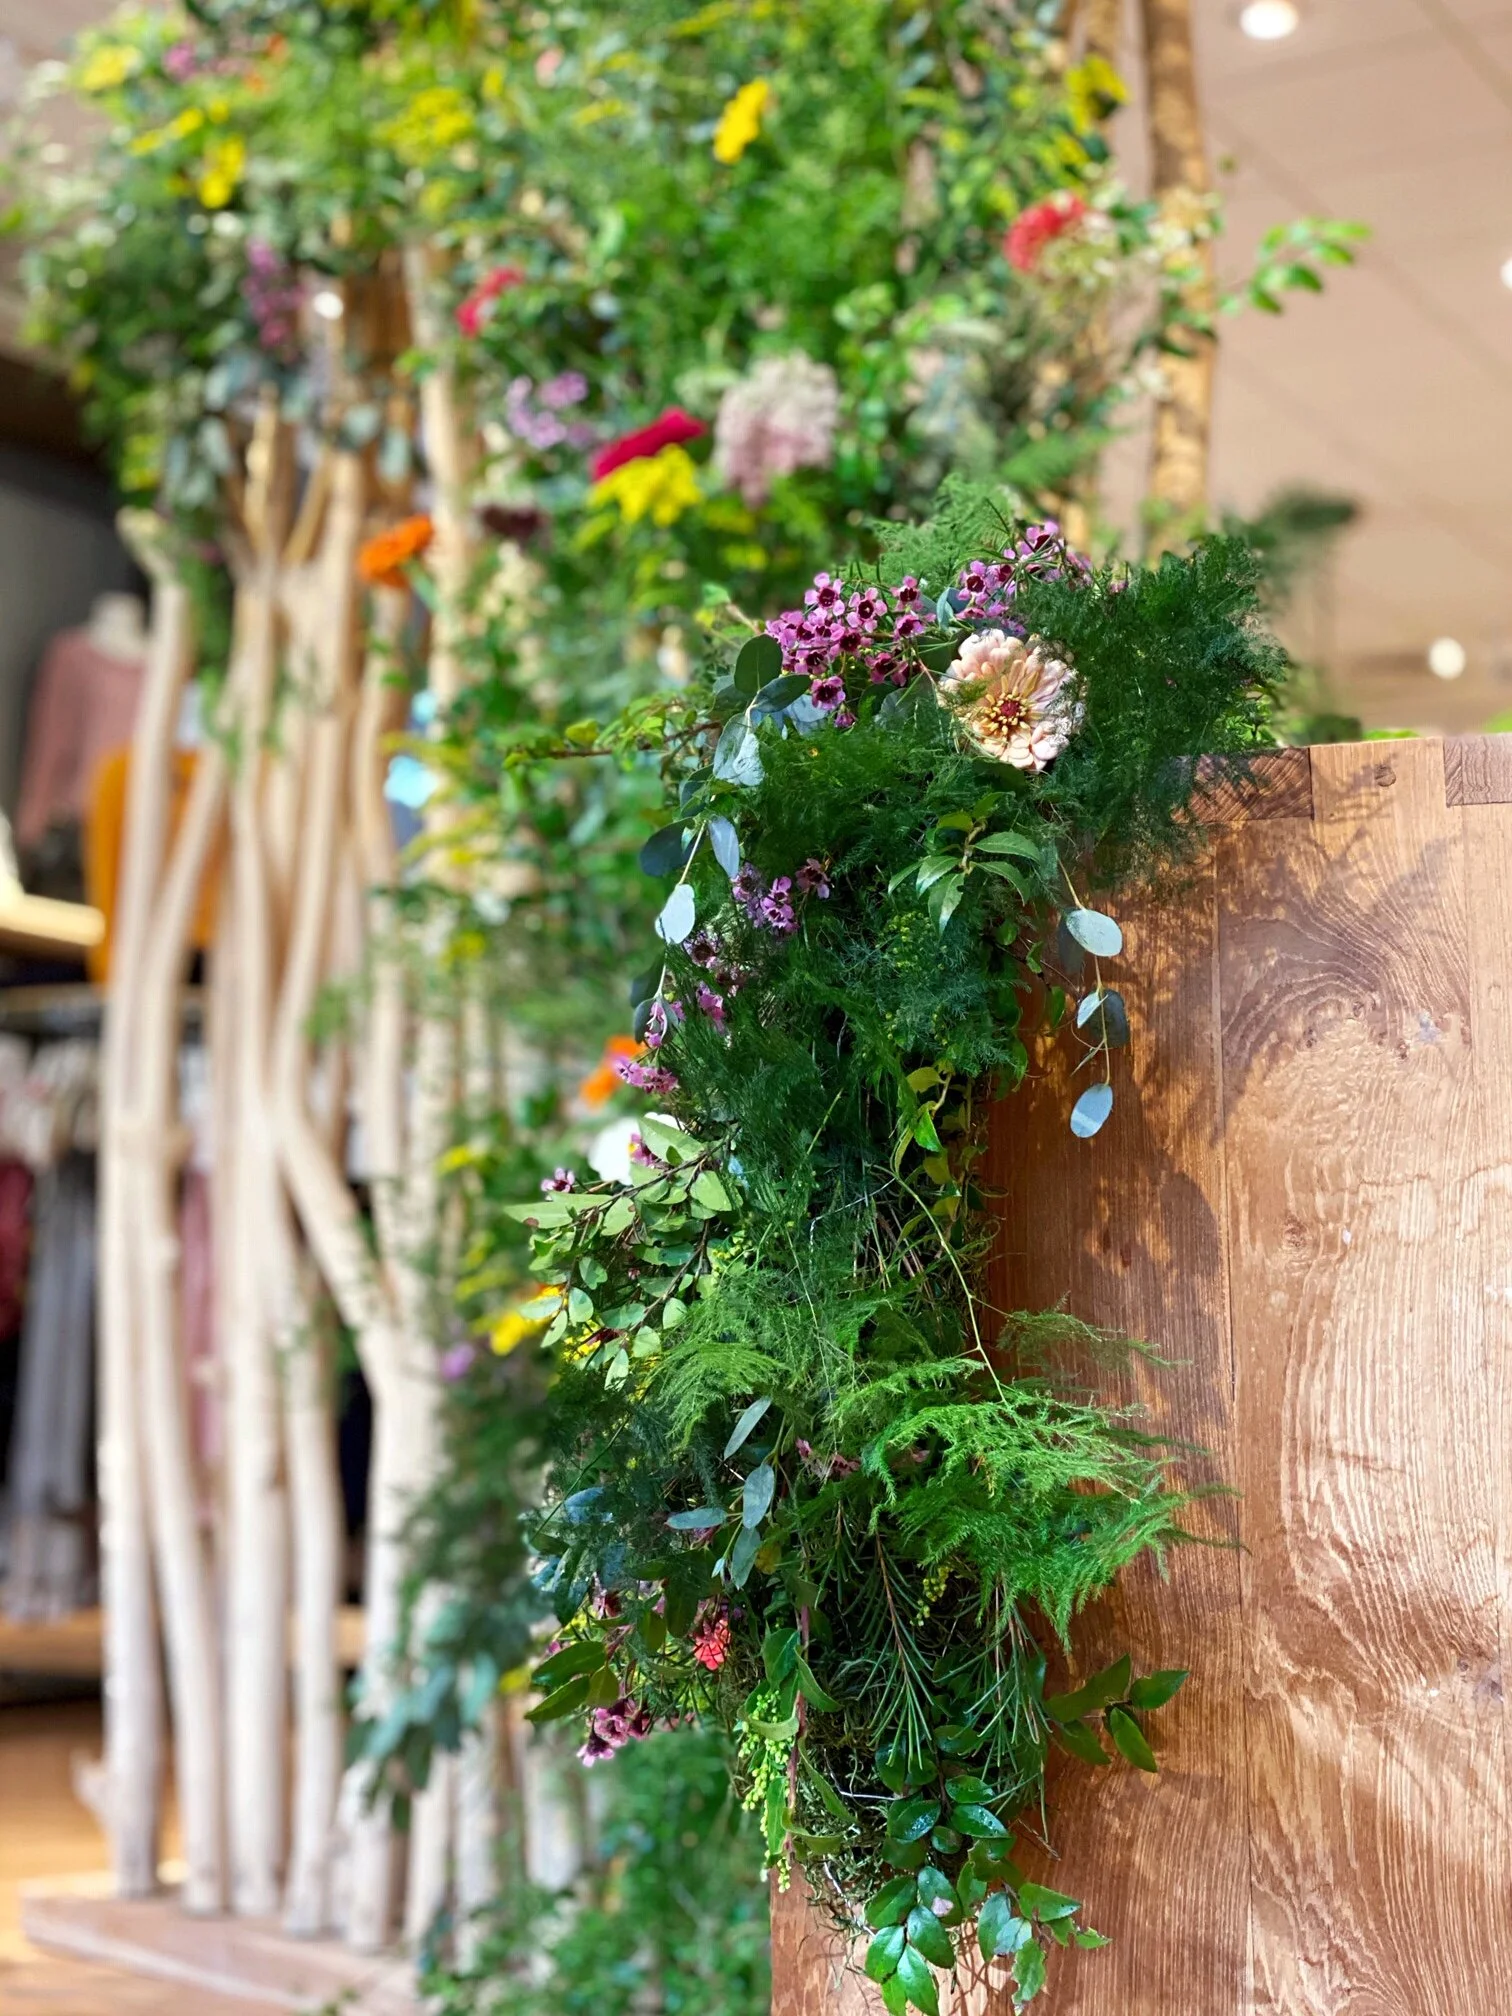
Add the flowers the same way as the greenery. You can color block or be completely random when placing the flowers.
As time goes on, some flowers will begin to wilt. Remove them to keep the wall looking fresh.
Spritz the wall with water or a hydrating spray when you are done.